🧶 Crochet Pattern: Tino the Tiger Vase – A Wildly Cute Plant Buddy 🐯🌼
✨ Introduction
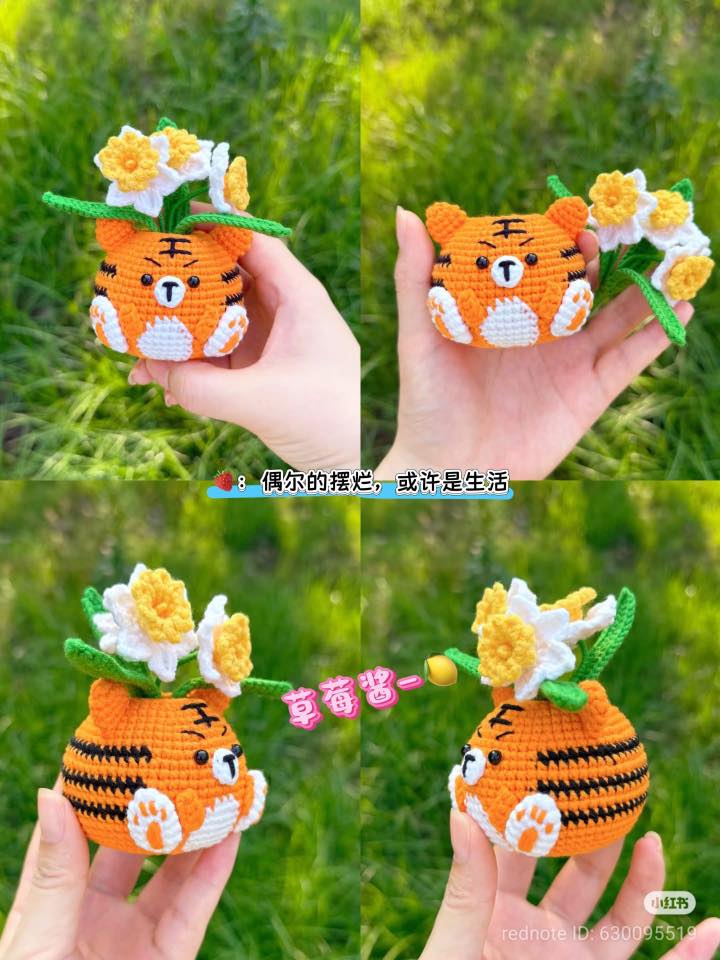
Hello, lovely yarn friends! Whether you’re a crochet pro or someone just diving into the world of amigurumi and functional crochet, you’re going to love today’s project. Introducing Tino the Tiger Vase – a charming, tiger-themed flower pot holder that brings jungle magic right into your home.
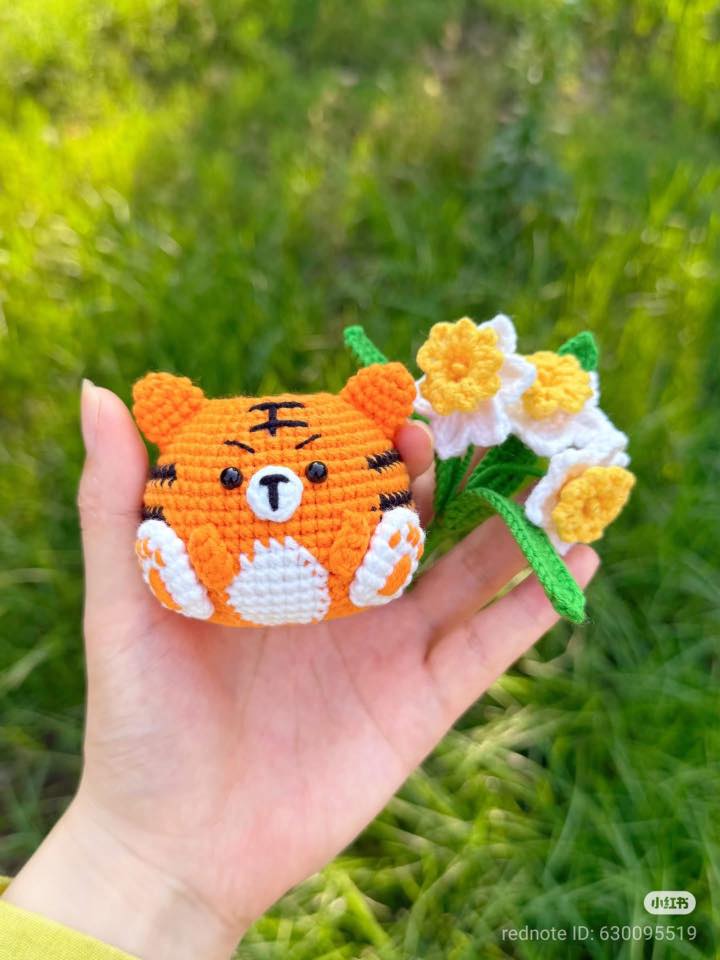
Tino is more than just a decorative piece – he’s a cheerful plant buddy with cute little ears, embroidered tiger stripes, and a snout you can’t help but smile at. Designed to wrap around a small pot or hold a faux bouquet, this tiger vase adds handmade warmth to any shelf, desk, or windowsill.
If you're new to crochet or nervous about amigurumi, don’t worry! This pattern uses simple shapes and stitches and is written clearly in US terms with row-by-row instructions. You'll be stitching, shaping, and assembling your very own tiger in no time.
🧵 Materials You’ll Need
To crochet your very own Tino the Tiger Vase, you’ll need the following:
Worsted weight yarn in:
Orange – main body and ears
Black – tiger stripes and facial embroidery
White – snout and optional inner ears
Pink (optional) – nose or cheeks
Crochet hook: 3.0 mm or 3.5 mm (use a smaller size for tighter stitches)
Plastic flower pot or container (approx. 3–4 inches in diameter) – for placing inside
Fiberfill stuffing (only if not using a pot)
6 mm safety eyes or black yarn for embroidered eyes
Yarn needle (for sewing parts together)
Stitch marker (to track rounds)
Scissors
🪡 Abbreviations (US Crochet Terms)
Here’s a quick reference of the abbreviations used:
MR – Magic Ring
sc – Single Crochet
Hdc - Half Double Crochet
Dc - Double Crochet
Tr - Treble Crochet
inc – Increase (2 sc in the same stitch)
dec – Decrease (single crochet two stitches together)
BLO - Back Only Loop
FLO - Front Only Loop
ch – Chain
sl st – Slip Stitch
st – Stitch
x – Times (e.g., repeat count)
🔸 Pattern Instructions
🐯 Head & Body (worked in one piece)
Using orange yarn, Blue Highlight for Black Yarn, Red Highlight for White Yarn
R1: 6 sc in MR (6)
R2: inc in each st (12)
R3: (sc 1, inc) x6 (18)
R4: (sc 2, inc) x6 (24)
R5–R16: sc in each st (24)
R17: BLO: sc 6, (sc 3, inc) x6, sc 6 (30)
R18: (sc 4, inc) x6 (36)
R19: (sc 5, inc) x6 (42)
R10: (sc 3, inc, sc 3) x6 (48)
R21: sc in each st (48)
R22: (sc 7, inc) x6 (54)
R23: 54 sc (54)
R24: (sc 4, inc, sc 4) x2, sc 2, sc 2, inc, sc 8, inc, sc 2, sc 2, (sc 4, inc, sc 4) x2 (60)
R25–R26: 60 sc (60)
R27: sc 22, sc 16, sc 22 (60)
R28: 60 sc (60)
R29: sc 29, sc 3, sc 28 (60)
R30: sc 23, sc 5, sc 5, sc 5, sc 22 (60)
R31-R32: sc 27, sc 7, sc 26 (60)
R33: (sc 4, dec, sc 4) x2, sc 4, dec, sc 1, sc 7, dec, sc 4, (sc 4, dec, sc 4) x2 (54)
R34: sc 24, sc 7, sc 23 (54)
R35: (sc 7, dec) x2, sc 6, sc 1, dec, sc 4, sc 3, dec, (sc 7, dec) x2 (48)
R36: sc 23, sc 4, sc 21 (48)
R37: (sc 2, dec, sc 2) x8 (40)
R38: (sc 3, dec) x8 (32)
R39: (sc 1, dec, sc 1) x8 (24)
R40: (sc 1, dec) x8 (16)
R41: dec x8 (8), fasten off and close.
🐾 Ears (Make 2 – Orange)
R1: 5 sc in MR (5)
R2: inc in each st (10)
R3–R4: sc around (10)
Leave a tail for sewing.
🐾 Nose (White)
R1: 8 sc in MR
Fasten off, flatten into an oval, and sew to face.
R1: 5 sc in MR
R2–R3: sc 5 (5) (in orange)
R4-R14: sc around (5), 1 row of orange and 2 rows of black
Fasten off, stuff lightly, and sew to the back.
🐾 Front Legs (Make 2)
R1: ch 5, skip 2, hdc into next 3 ch
Fasten off and attach to the front body.
🐾 Back Legs (Make 2)
R1: 5 sc in MR
R2: inc in each st (10)
R3–R4: sc in each st (10)
R5: dec around (5), flatten and sew to bottom.
🌼 Flower Pieces
Petals (Make 3 – White)
R1: 6 sc in MR
R2: inc in each st (12)
Work 6 petals: in next 6 sts – [ch 2, dc, Tr, Picot Stitch], [Tr, dc, ch 2, sl st] in same st.
Center (Make 3 – Yellow)
R1: 6 sc in MR
R2: (sc 1, inc) x3 (9)
R3–R4: sc around (9)
In each st: [ch 2, sl st] x9 for a frilly look. Fasten off.
Leaves (Make 3 – Green)
Ch 20
Starting from 2nd ch: sc 18, (sc, picot stitch, sc), then sc 18 along the other side. Fasten off.
Sew ears to the top sides of the head.
Embroider or attach eyes, nose, and face details.
Sew legs to the body, back ones for sitting posture.
Attach tail to lower back.
Create flower bouquets by sewing petals around centers, attaching leaves.
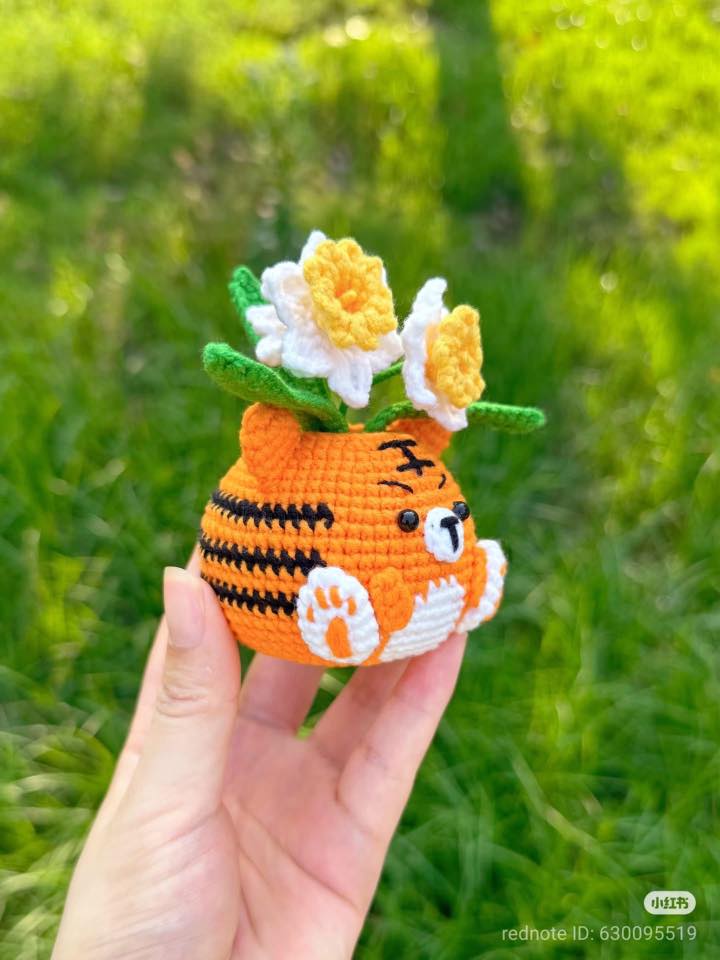
Insert flowers into the opening on top of the head – you can glue or sew in place.
💬 Questions or Help?
Need help with the snout shaping or stripe placement? Feel free to leave a comment or message us on social media! We love seeing your works and helping out fellow crafters.
🙏 Support Our Work
We’re passionate about sharing joyful crochet creations for free, and your support keeps us going! If you loved this project, please consider:
❤️ Leaving a kind comment below
📢 Sharing this pattern with your crochet friends
☕ Donating a small amount – even $1 helps! [Support Us]
💌 Conclusion
Tino the Tiger Vase is more than a container—it’s a conversation starter, a smile-bringer, and a symbol of the joy handmade items can bring. Whether you're using it as a flower pot cozy, a pen holder, or just as a cute display plush, this tiger will brighten your day and your space.
We hope you had fun stitching this little guy together. Don’t forget to tag your makes with #TinoTheTigerVase on Instagram or Pinterest—we’d love to see your jungle creations!
Stay creative, keep stitching, and see you in the next pattern. 🐾🧡
📸 Credits
Original design inspired by 小红书 (Xiaohongshu) user: @吃橘子
Pattern write-up and translation by Cozy Crochet Tales
📌 Pattern Credit & Disclaimer
This crochet pattern is inspired by a design created by 吃橘子, a talented crochet artist who originally shared their work on platforms like 小红书 (Xiaohongshu). These beautifully crafted pieces have been shared across various social media platforms, and we discovered them as part of our love for handmade creations.
We do not claim ownership of the original design. This version has been translated and adapted into US crochet terms purely for educational and personal crafting purposes, to help fellow crocheters follow along more easily.
Our goal is to share joy, promote creativity, and encourage handmade artistry while respecting the original creator’s work. If you are the original artist and would like credit updated or content removed, please contact us directly—we’re happy to cooperate and make any necessary changes.
🧶 Support independent artists by exploring and supporting their original creations whenever possible.
Comments
Post a Comment